

Llama Cushion Tutorial
- Craft Cotton Co
- Mar 7, 2019
- 2 min read

You will need
1 x Set of Llama Llama FQ’s
Fusible web
Felt & Embroidery thread
Zip (optional)
Wool & Pom Pom maker
I chose two fabrics from the FQ set. R/S together, cut 8’’ across both sections.

Sew one 8” Section and one 10” R/S together, you will now have two backgrounds.

Create a Llama template, I drew this one by hand but there are lots of images available if you don’t feel confident to draw your own.

Copy the image onto some double sided fusible paper. Iron onto the fabric you chose for the Llama. Cut the shape out, peel off the paper.


Iron the Llamas onto the background fabric, then top stitch round.

Use some wool felt to create the Llama hair do.

Using a bow maker I created a tiny Pom Pom as above with embroidery thread. Attach to Llamas neck and then sew an eye, nose strap and reigns.

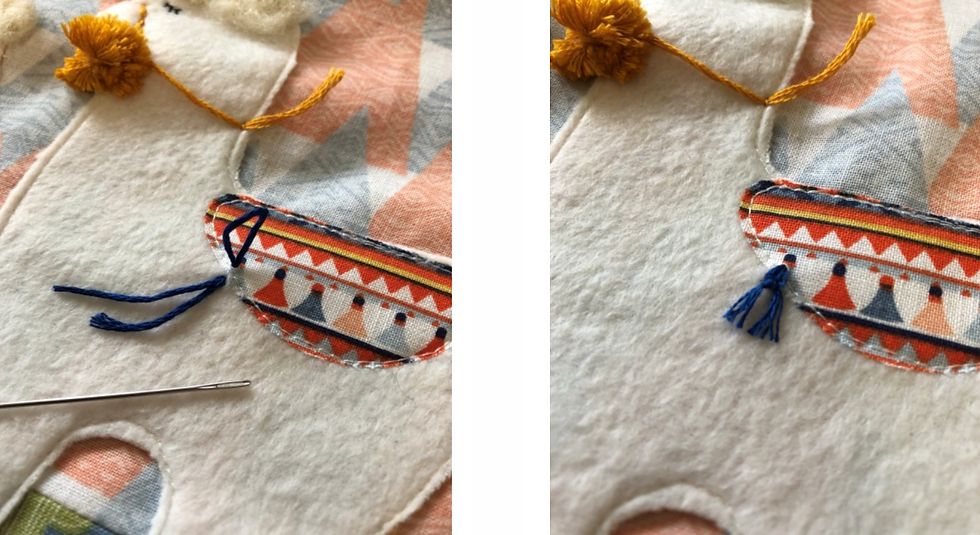
Make a saddle from another of the co-ordinating fabrics, and add some tassels.
With the second piece made earlier, mark 2’’ in from each end across where the pieces are joined.

Unpick the stitches carefully in between the two marks you made. This is where you will insert the zip.

With an appropriate sized zip, place it from the inside R/S out and pin to secure on the outside.

Sew with a zipper foot on your Sewing Machine. Do one side at a time.

Once you have sewn down both long sides of the zip do a few security stitches back and forth over the zip ends. R/S to R/S put the back section on top of the front section, pin and sew all around the outside of the cushion.
TIP (open the zip before sewing round the outside)

Turn the right way out and add a couple of fun Pom Poms.. Ta Da!!!!!!

I hope you enjoyed this tutorial and it has inspired you to have a go. I would love hear your feedback and see your creations, please share with me, on Instagram @bobbincottagebodkin

Made by Nicola Hills for The Craft Cotton Company 2019