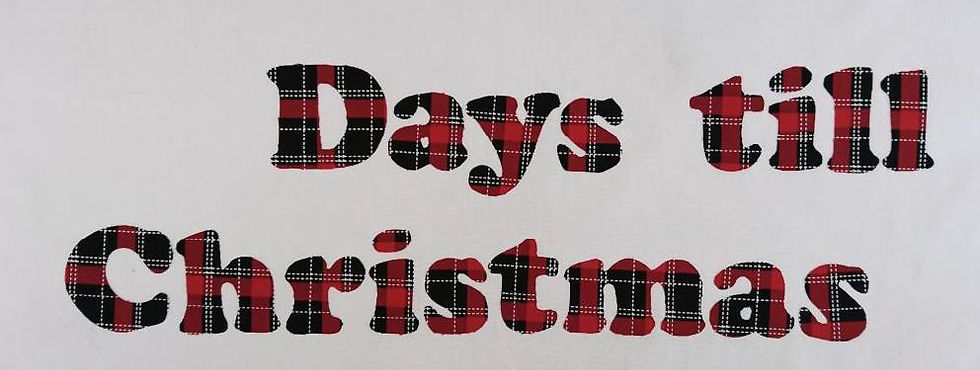
Follow my tutorial, on how to make your very own ‘Countdown to Christmas wall hanging quilt’. These gorgeous tartan Christmas fabrics are all available from ‘Craft Cotton’, and also available to purchase in Fat Quarter packs at Hobbycraft
Please read through all the instructions before starting your project Finished size: 12” x 18” plus drawstring bag to hold the spare numbers
Materials Main quilt and numbers
• FQ of Christmas red/black tartan fabric
• FQ of Christmas red/black hearts on grey fabric
• FQ of white poly cotton
• 12” x 18” piece of Bosal Fusible batting
• Two 6” squares Bosal Fusible batting
• Two 6” squares of red/black tartan fabric
• Gutermann white thread 1001
• FQ of Vlieseline Bondaweb
• 64” natural linen bias binding
• 10” of velcro
• 8” ‘deck the halls’ ribbon Drawstring bag
• Two 7” x 5 ½” red/black tartan fabric (lining)
• Two 7” x 6” red/black hearts on grey fabric (outer)
• Two pieces of 16” x ¼” white ribbon
• 6” ‘deck the halls’ ribbon

Haberdashery items • Iron-away marker pen • Quilters ruler, rotary cutter/scissors • Iron • Cutting mat • Basic sewing supplies • **‘Countdown’ Templates • 505 basting spray or pins **templates can be made by typing the letters Days till Christmas in font Cooper Black, size 200 into Microsoft Word. Type the numbers 0,1,1,2,2,3,3,4,5,6,7,8,9 using the same font and size – print
Making the Countdown Quilt Begin by cutting all the pieces of fabric: 18” x 8” white fabric Two 18” x 2 ½” strips from the heart fabric – fussy cut, so the hearts sit central 18” x 12” red tartan fabric (backing)
Let’s Begin… Print off the templates and trace the letters and numbers through to the other side of the paper, so you have them in reverse. Trace these onto the Bondaweb, roughly cut out and fuse using a dry heat to the red tartan fabric (not the backing piece).

Carefully cut around each letter and number, peel the backing papers from the letters and place on the white fabric, once happy with the positioning of the letters, fuse using a dry heat.

Cut two 2” strips of the rough side of the Velcro, place on the white fabric and draw around them with the heat erasable fabric pen, sew in place.

With RST sew the grey heart strips to the top and bottom of the white centre piece. Fuse to the batting, repeat for the backing fabric using basting spray Swap out your machine foot for a FMQ foot. Sew 1/8” from raw edge around each letter using Gutermann white thread.

Cut two strips from the ribbon, each measuring 4”, fold in half and pin 2 ½” from each top corner. Add the bias binding to the front, and hand sew to the reverse.

Creating neat corners as you sew. Leave a 3” piece from the bottom left hand edge unsewn, this will be where the bag will hang from.

Fuse the two pieces of batting to the two pieces of red/black fabric, using a heat erasable fabric pen, draw around each of the previously cut numbers.

Carefully cut around each number. Cut the soft side of the Velco, into thirteen ½” pieces, sew each piece to the right side of the numbers (the numbers with the batting attached, not the Bondaweb numbers)

Peel away the backing papers and fuse each number to its corresponding number. Using a FMQ foot on your machine, sew around each number 1/8” from the raw edge, trim away any excess.

Let’s create the drawstring bag…

Take the bag pieces of fabric, and mark 1 ½” down for each top corner. Sew the lining pieces together with right sides facing from this mark all the way round to the other mark, repeat with the two outer pieces.

Press seams open. Sew the folded edge from the top to the 1 ½” mark.

Place the lining piece inside the outer piece, with wrong sides facing. Match and pin side seams. Fold over ½, press and fold a further ½” over, press and sew.

Thread the ribbon through the gap you’ve created all the way around, then repeat with the other piece of ribbon, started at the opposite side. Tie the two ends together with a small knot.

To attach the bag to the quilt, pin the raw end of the ribbon, 1 ½” from the bottom left hand corner on the reverse of the quilt where you left it unsewn and sew in place, complete the binding on the quilt.

Unpick a couple of stitches from the bag top seam, push the other end of the ribbon, and replace the stitches, making sure to go over a few of the remaining stitches where you have unpicked.

Your countdown Christmas quilt is complete…

This Countdown Christmas Quilt and tutorial has been designed and created by Michelle at creativeblonde.

To see more of my tutorials, you can follow my blog www.creativeblonde.co.uk and/or Instagram page www.instagram.co.uk/creativeblonde66 and www.facebook.com/creativeblonde66 Stockist for the fabrics and wadding found in this tutorial www.craftcotton.com 0161 832 9431 Stockist for Gutermann threads gutermann@stockistenquiries.co.uk 01453 883581 Stockist for Vlieseline stabilizer and Vlieseline Bondaweb www.ladysewandsew.co.uk 01628 890 532 Stockist for Christmas Ribbon www.facebook.com/GrovesLtd
Made by Michelle Roberts for The Craft Cotton Company 2018

