Denim Nine Patch Block Quilt
- Craft Cotton Co
- Apr 13, 2017
- 2 min read
Now that Spring is here, make the ideal lap quilt to keep your knees warm whilst enjoying sitting outside in the Spring sunshine.

What you need:
Step 1:
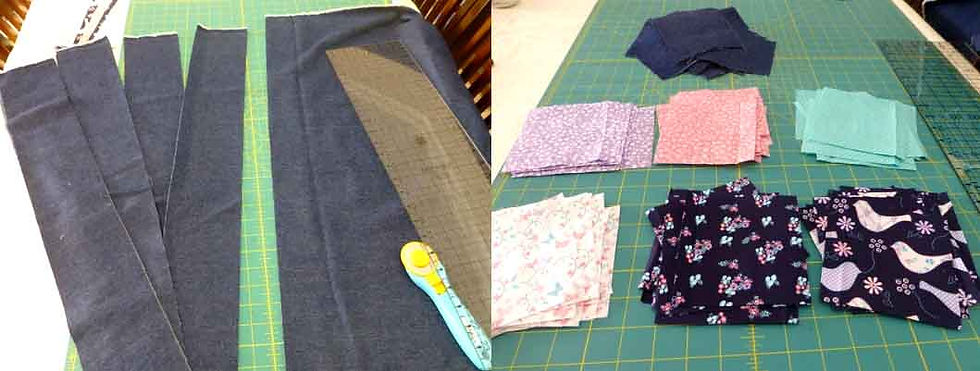
Using your rotary cutter and ruler, cut your fat quarters into 4 ½” strips

Step 2:
Cut the denim fabric into 4 ½” strips then cut all strips into 4 ½” squares.
This quilt needed 60 patterned squares and 48 denim squares.
Step 3:
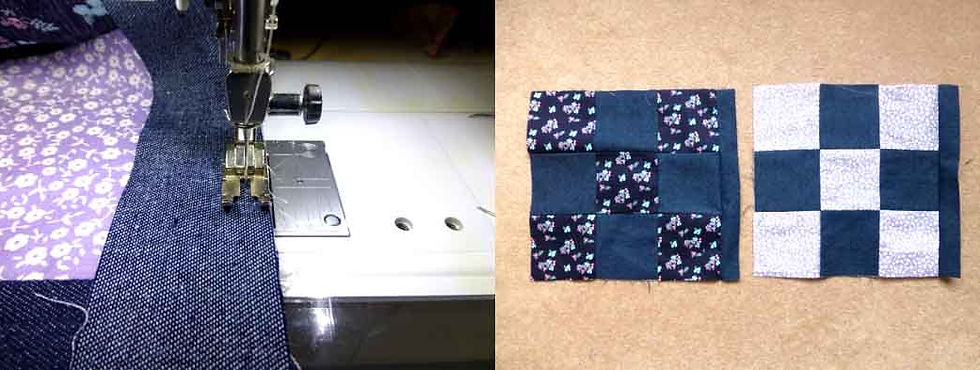
Play around with your fabrics to decide on which layout your prefer for the nine patch blocks.

Step 4:
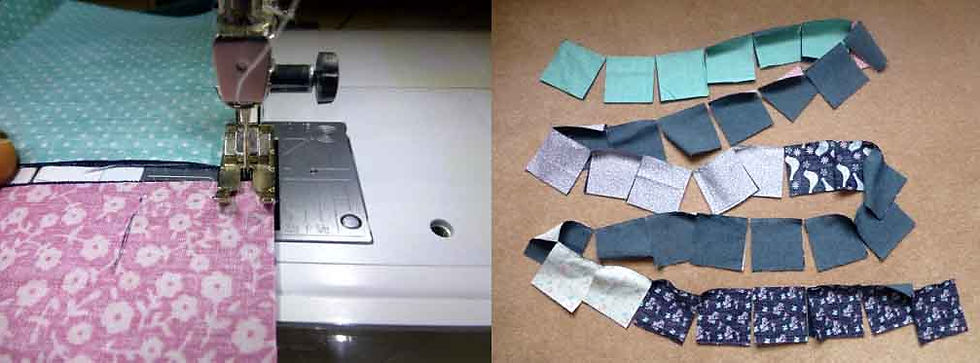
Following your layout design, stitch the squares along one edge with right sides together: using the ¼” foot on your sewing machine helps with accuracy.

Step 5:
Using a technique called chain piecing (when you sew your pieces together with one continuous length of thread without stopping and cutting thread in between pieces) is a great time and thread saving idea.
Your finished ‘chain’ looks like a string of bunting!
Simply snip the joining thread in between each piece.
Step 6:
Following your layout design, sew the third square onto each row of the block. Press the seams carefully towards the patterned side of fabric on each row.
Set the seams by carefully pressing on the front side of the fabric.

Step 7:
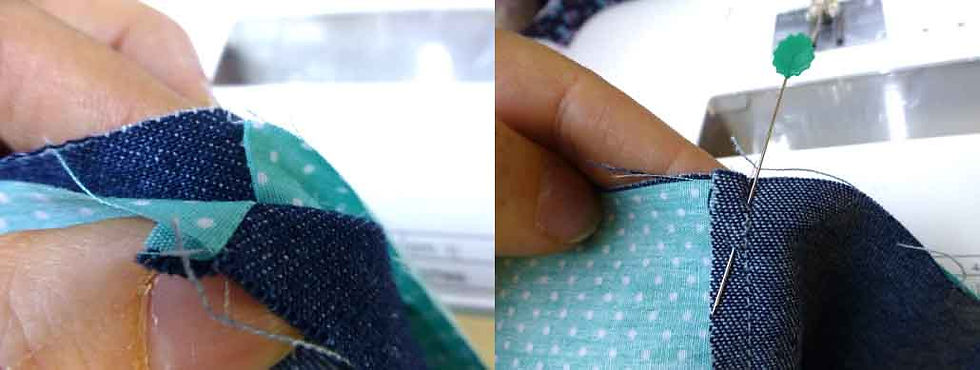
Carefully align or nest the seams of each row in the block together and secure with a pin.
Step 8:
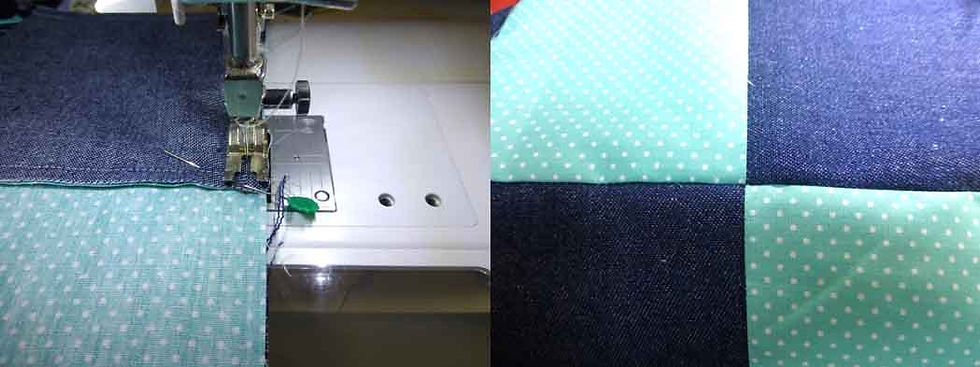
Stitch each row of the blocks together along the long side, making sure you stop close to the pin with the needle in the down position before then removing the pin.
This will help with accuracy where the points of the patches meet together.
Step 9:
When looking at the reverse side of the block, you will notice how the seams all align and sit together well.
Set the seams by carefully pressing on the front side of the fabric.

Step 10:
Arrange the quilt blocks together into preferred layout.
Take a photograph to refer to when at the sewing machine!

Step 11:
Cut 1 ½” strips of denim for the sashing pieces.

Step 12:
Stitch the sashing to the right side of the block (right sides together) then stitch the blocks together in pairs then add the third block to each row before joining all rows together with sashing pieces.
Step 13:
Baste the quilt top onto the soft dimple fleece backing using a temporary spray adhesive or traditional basting pins/stitches.

Step 14:
Using a walking foot on your machine, quilt both layers together with your chosen stitch design/pattern. Once quilting is completed, trim away any excess backing fabric.

Step 15:
To finish the quilt, attach binding, right sides together, around all four sides of the quilt.
Hand stitching the binding onto the back of the quilt gives a neat finish.

Step 16: Iron the lap quilt then take it outside and enjoy the chilly Spring sunshine!

© by Angela Harkness for The Craft Cotton Co

